¶ Community Custom Builds
Some advanced users may want to do a custom build. This is possible, but there could be problems that may be difficult to solve for less experienced users.
WARNING - Custom build at your own risk! Many hardware setups can cause problems.
Requirements for Bitcoin Node Custom Build:
- Single-board ARM Computer
- Proper heat sink
- 2TB SSD
- Necessary Adapters
- Max Endurance MicroSD Card
- Power Supply
Single-board Computers we have seen used for custom building:
- Raspberry Pi5
- Raspberry Pi4
- Odroid N2
Finally, one more reminder that it is mainly up to the community to help one another with custom builds. We cannot be held liable for third party hardware issues.
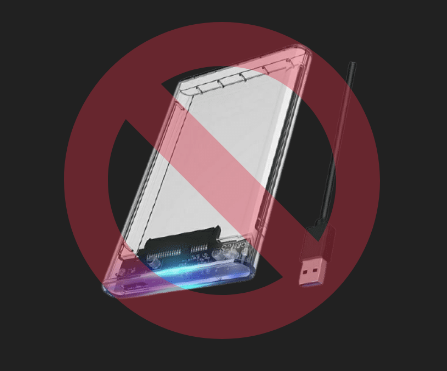
¶ AVOID SSD ENCLOSURES AND ADAPTER CABLES!
⚠ AVOID SSD ENCLOSURES AND ADAPTER CABLES! - Use SATA Drives + Enclosures at your own risk! ⚠
IF YOU ARE USING SOMETHING OTHER THAN THE RECOMMENDED HARDWARE, YOU COULD RUN INTO ISSUES SUCH AS I/O ERRORS OR PROBLEMS WITH DRIVE ENCLOSURE POWER WHICH CAUSE SSD FAILURE.
¶ Copy Blockchain Data
If your device is slow and will take a very long time to download and sync the blockchain and indexer, then consider trying to use a backup SSD or try to copy data from another node to your RoninDojo. These methods will typically be much faster than waiting for the initial blockchain download.
¶ Raspberry Pi - Plug N Play
¶ Flash Operating System
- Download Balena Etcher.
- Download the RoninOS image from our website if one is available or try building your own image. This image should work for any Raspberry Pi.
- If you download an image, it's recommended that you verify the image using using PGP. If you are unsure about verifying please see our verification page.
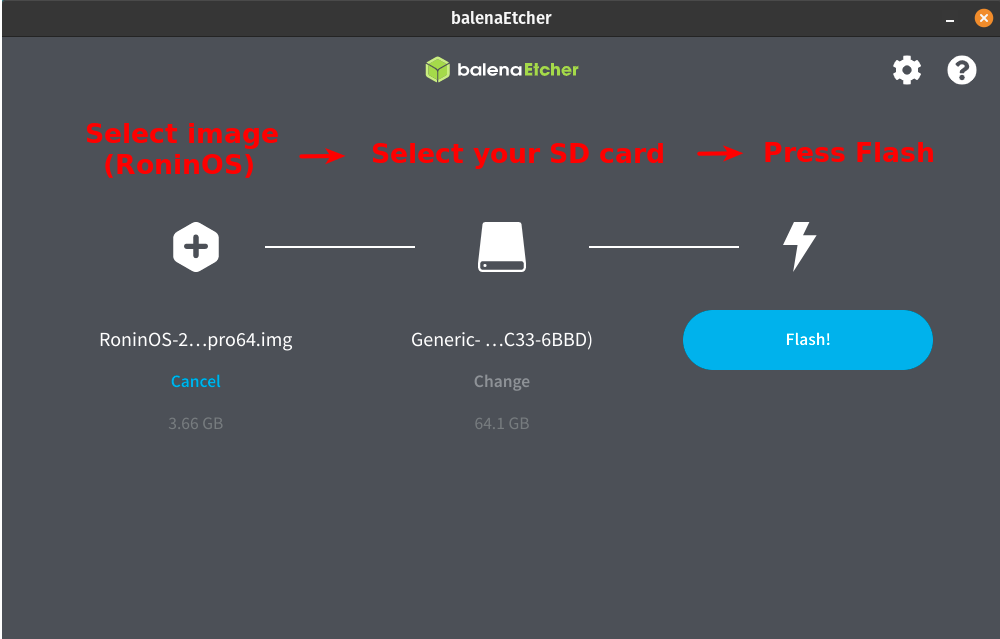
- Insert micro SD card into your PC, open Balena Etcher, select the RoninOS image, select your microSD card, and finally press
Flash!
- Boot up your Rasperry Pi and then follow normal setup guide on this wiki.
¶ Raspberry Pi - Manual Install
¶ Rpi Imager
¶ Step 1: Download the official Raspberry Pi Imager software
Raspberry Pi Imager is the quick and easy way to install Raspberry Pi OS and other operating systems to a microSD card, ready to use with your Raspberry Pi.
- Windows users: Raspberry Pi Imager for Windows
- MacOS users:Raspberry Pi Imager for MacOS
- Ubuntu/PopOS/Debian users:Raspberry Pi Imager for Ubuntu
¶ Step 2: Install the official Raspberry Pi Imager software
- Windows users: Double click the imager_1.7.x.exe in your Downloads folder and follow the instructions on screen. Launch the application when installation has completed.
- MacOS users: Double click the imager_1.7.x.dmg in your Downloads folder and follow the instuctions on screen. Launch the application when installation has completed.
- Ubuntu/PopOS/Debian users: Open Terminal and then do the following:
cd Downloadsand Press ENTERsudo apt install ./imagerthen Press TAB key and then Press ENTERtype
yand Press ENTER to install all dependenciesClick show applications icon
select Imager with the app icon of a Raspberry to launch the application.
¶ Step 3: Configure Raspberry Pi Imager Software
With the Raspberry Pi Imager Application launched you should be looking at a screen that looks like this:
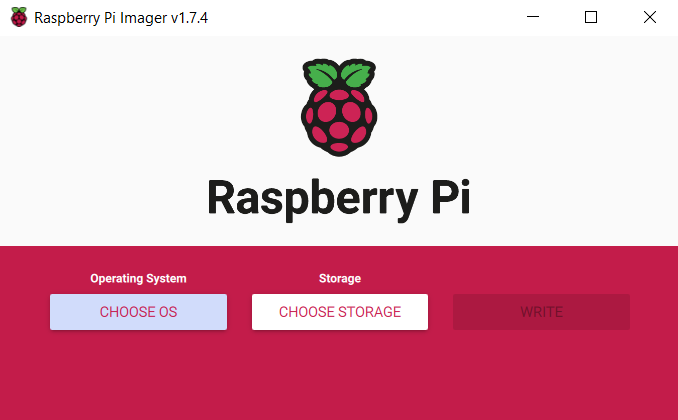
- Click CHOOSE OS and you will see options appear. You want to select by clicking on Raspberry Pi OS (other)

- Scroll down and select by clicking on Raspberry Pi OS (Legacy, 64-bit) Lite

Before Proceeding: You should ensure your microSD that you removed from Step 2 is now in a suitable adapter and it is connected to your computer/laptop.
- Click CHOOSE STORAGE then you want to select by clicking on Generic MassStorageClass 31.9 GB it should look something like this:

The below is an essential step and must be carried out prior to writing the microSD card. Please take care with this next step otherwise you may experience issues and will be required to re-flash the microSD.
Click on the Cog icon to load the Advanced Settings Options
- Set hostname to
RoninDojo - Check the box to enable SSH
- Set a temporary username
pi(This user will be removed later) - Set any temporary password for the user Pi and make a note of it.
- Set locale settings (timezone and keyboard layout)
- Disable Telemetry by removing the check
- Set hostname to
Once you have completed the above steps check that your options look like this:
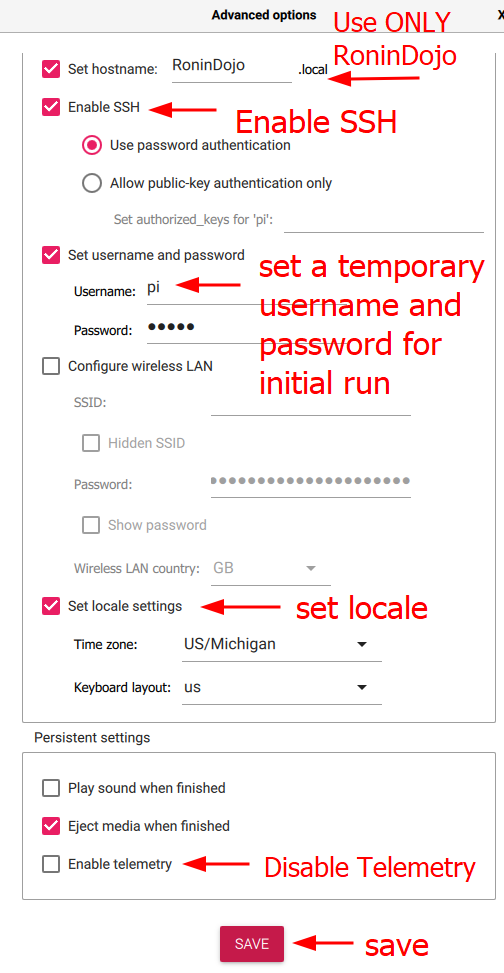
If your settings match the screenshot above Click SAVE
Click WRITE to write the microSD
A pop up will appear asking you to confirm you wish to delete all existing data on the selected storage device. Use this opportunity to double check that you are erasing the correct device i.e. The Generic MassStorage 32GB microSD card.
- If you are satisfied you are erasing the microSD click YES

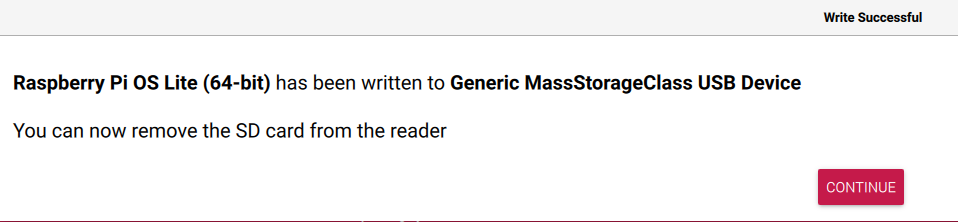
- When you see the Write Succesful pop-up appear you can remove the microSD from the computer/laptop and Click CONTINUE
¶ Step 4: Spin your node back up
- Insert your microSD card back into your node.
- First, reconnect your Ethernet cable.
- After you have reconnected the Ethernet cable, then connect the power supply.
- Press the power button (if applicable).
¶ Rpi Setup
¶ Step 1: SSH into your node
Notice: if you are struggling to find the IP address, ensure your node is turned on! You can also try using Angry IP Scanner or check your router control panel.
- Open a new clean Terminal/Powershell
ssh-keygen -R [IP]For examplessh-keygen -R 192.168.1.140ssh pi@[IP]For examplessh pi@192.168.1.140- type
yesand Press ENTER when asked Are you sure you want to continue connecting? - type the password you set in Step 5 and Press ENTER
¶ Step 2: Update RPi OS and Preparation for RoninOS
Be sure to wait the full 10 minutes for the preparation setup to complete in terminal before continuing to Step 9 otherwise you may experience issues and will be required to re-flash the microSD.
¶ Step 3: Start RoninOS Setup
We are almost there now. We will do a couple more command line instructions to install RoninOS
All good things come to those who wait, we are almost there be sure to grab a cup of coffee and wait a further 30 minutes before proceeding to the next step.
¶ Step 4: Access the RoninUI
- After 15 minutes is up, open your web browser and navigate to the IP address of the node in the URL bar. For example 192.168.1.140
alternatively
- Navigate to ronindojo.local
¶ Step 5: Complete RoninUI setup
Follow the on-screen instructions:
- Note down the root password.
- Create a user password (used for logging into the RoninUI, and for SSHing).
- Then wait for your node to complete initialization.
- Proceed to the dashboard
- Then you can Ctrl+C out of the log or simply close the terminal.
¶ Step 6: Remove the temporary pi user
Open a new clean Terminal/Powershell
ssh ronindojo@[IP]For examplessh ronindojo@192.168.1.140enter the password for RoninDojo that you set in Step 11
You may be asked to re-enter the password a second time, go ahead and do so
At the RoninCLI menu choose Exit RoninDojo
type
sudo deluser --remove-home piand Press ENTERtype
sudo reboot nowENTERYou did it! Enjoy RoninDojo 2.0.0
¶ Step 7: Wait for your node to catch back up
If you have blockcahin data and indexer data it will be salvaged. You just need to wait for them both to catch up to the latest blockheight.
Before continuing, wait for the following to be displayed within your RoninUI:
- Dojo 100% Synchronized
- Bitcoin Core 100% Synchronized
- Indexer 100% Synchronized
Notice: If Dojo does not reach 100% Synchronized, restart Dojo from within your RoninUI by going: Dashboard > Dojo > Manage > Restart, then wait for Dojo to reach 100%.